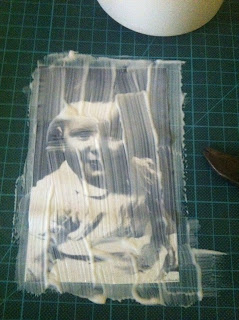
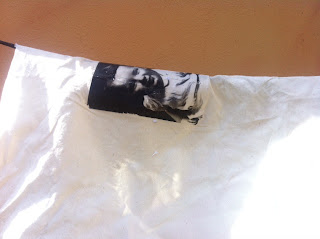
So I collect vintage photos and have done for a long old time, I found one that I liked and copied it on the photo copier and trimmed it to size
This paste will only work with photo copied or with an inkjet colour print.
A quick tip also it doesn’t say on the tub and I didn’t do it for my project but the image is always reversed so if you wanted to incorporate text you need to do the text in reverse also, if you are a dab hand at this then go for it but when I did this as a craft group I got the students to write the text on a piece of acetate and then turn it round so the text is in reverse and place it with the work!!
So the next step is cover the image in the paste, give it a really thick coat
Then place it face down on your fabric and with a rolling pun smooth it out rolling up and down and left to right
Leave it for a couple of hours to dry I actually left mine over nights so that I knew it was super dry
Once it is dry dampen your work with a cloth you will start to see the image through the paper and then rub with your fingers and remove all the paper from the image - this part is messy and gross but the over all effect is great!!
Next dry out your work - something I have noticed is the more generous that you are with the initial application of the past the image comes out a lot crisper !
Once the image is dry apply a thin coat of the paste to seal the image and once that is dry voila you are done!!
My image I turned into an embroidery and when stitching through the transfer I had no problems I thought at one point it would be similar to working with vinyl but it is surprisingly easy to work with!
So there we go I hope that you enjoy and look forward to hearing about you’re projects!!


No comments:
Post a Comment