Wednesday, 22 May 2013

Image transfer tutorial


 I am completely honest when I say that I really like using the Dylon Image maker paste and the first time that I used it last year I promised myself I would do something more with it and see how far I could take it!

So I collect vintage photos and have done for a long old time, I found one that I liked and copied it on the photo copier and trimmed it to size


This paste will only work with photo copied or with an inkjet colour print.

A quick tip also it doesn’t say on the tub and I didn’t do it for my project but the image is always reversed so  if you wanted to incorporate text you need to do the text in reverse also, if you are a dab hand at this then go for it but when I did this as a craft group I got the students to write the text on a piece of acetate and then turn it round so the text is in reverse and place it with the work!!


 So the next step is cover the image in the paste, give it a really thick coat

Then place it face down on your fabric and with a rolling pun smooth it out rolling up and down and left to right


 Leave it for a couple of hours to dry I actually left mine over nights so that I knew it was super dry

Once it is dry dampen your work with a cloth you will start to see the image through the paper and then rub with your fingers and remove all the paper from the image - this part is messy and gross but the over all effect is great!!


Next dry out your work - something I have noticed is the more generous that you are with the initial application of the past the image comes out a lot crisper !

Once the image is dry apply a thin coat of the paste to seal the image and once that is dry voila you are done!!
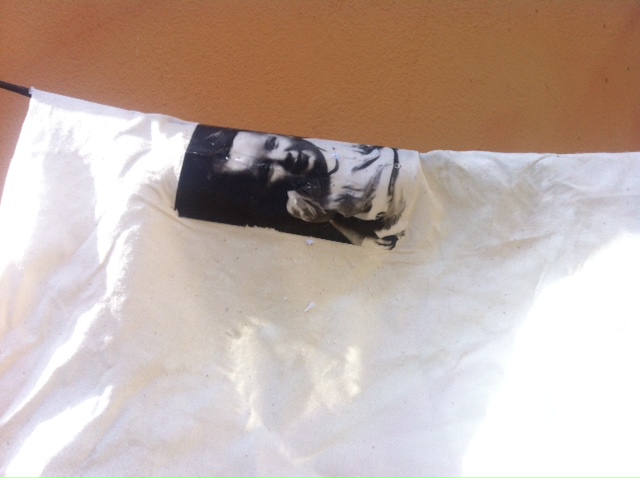


My image I turned into an embroidery and when stitching through the transfer I had no problems I thought at one point it would be similar to working with vinyl but it is surprisingly easy to work with!


So there we go I hope that you enjoy and look forward to hearing about you’re projects!!

Monday, 20 May 2013

Its the little things...

...about living in Brighton that makes it so fun!


Last night some Tupperware changed my life!


So I was poking around my local pound-land and found a clippy cylinder Tupperware and as I am working on a piece of 3D work it not only fit’s the work but I am not even squishing the tiniest bit of it!


My tiny mind is blown these can be bought from pound-land stores - this one is a 1.4l and I intend on getting a few more to!

I am not a lover of revision!


So over the past few weeks it has been uber quiet! The reason for this has been final exams for 3 courses I have been working on and for the first time in a long time I had to revise and it was HORRIBLE!!

So to make myself feel better I have been working on some bits and pieces and personal projects, my intention is to get an online shop happening soonish!!

My loves this week have been French knots and chain stitch, crochet daisy (this blanket is still happening) and working on my drawing!!


Someone wishes you all a fab day!

Thursday, 25 April 2013

Bitter's pom pom tutorial!

When I say things have been busy in crafty towers it would be an uber understatement!
I have been able to get a couple of tutorials done though!! and with the nice weather coming up there will be many more to come!!

Right so here is my pom pom tutorial!
Im more of an old school pom pom maker but there are lots of fun contraptions out there to make pom poms with!
I normally use two pieces of card but have been using these prym ones lately as they're easier to find in my craft bag!

Okay so to start with we have our discs


 The neat part of these ones is - they have a handy little channel in the centre


Now wind away! get colourful and get as much as you can get on there!!
I normally wind a little wool round my fingers and make a mini ball to get through the centre of the disc.

This is great TV craft!!

Okay so now that little groove in the centre has time to shine, cut round the discs .


you know its right when your soon to be pom pom looks like a sesame street puppet!!!

Part the discs a little and get a length of yarn to tie in the centre i normally find a long darning needle and just thread the yarn through and stitch it in the centre for extra security!!
Then just fluffy up your pom pom!! these are perfect for garlands and cushions jewelry all sorts I think that pom pom garlands maybe this years new bunting!!!

Enjoy, and feel free to email links to your own pom pom projects!!


Saturday, 6 April 2013

A sketch a day...

...keeps my tutor happy!

And you can see some awesome sights such as a man dancing on Hove platform in the snow and finally conquering perspective drawings!!!


Friday, 5 April 2013

On a long train journey...

...or when you just fancy a change.
Daisy granny squares, my aim is to have the outside - inside and snooze on it!!!
Tutorial coming soon!!!